
Episode 3 Fig Tree
Latin: Ficus Carica
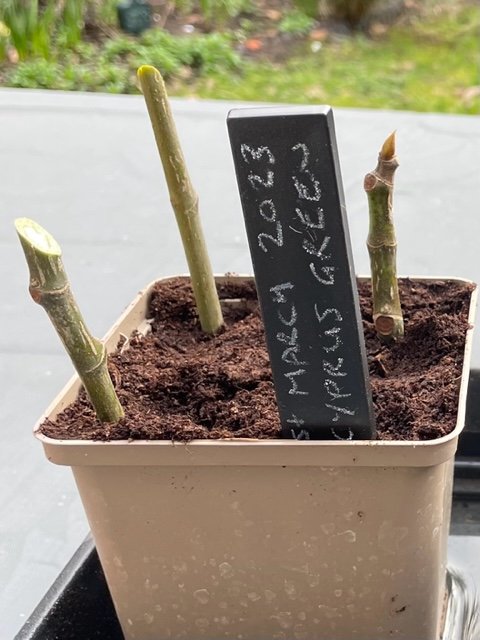
My new Fig tree cuttings
Go to bottom of page to see progress so far!
Good news I am now the very proud owner of several Fig tree cuttings. I’ve met Harry who is the owner of the Fig tree near the tube station and he generously helped me to take some cuttings. He is Greek Cypriot and the original Fig tree, from which my cuttings come, is from Cyprus. His mum was gifted some cuttings which she grew on her allotment and now in her 80s and unable to maintain the allotment, Harry took cuttings and brought them to this small plot outside his flat. So watch this space and I will let you know how they get on. If you want to read more stories about Fig trees, do take a look at the Fig Tree Gallery on Mary Menniti’s Italian Garden Project website.
As Dion told us, every year he and his siblings would sit and watch his father wrap the Fig tree in their backyard to protect it from the Boston winter

Dion’s dad - Anthony Scoppettuolo
Then their dad would go to their grandfather’s and wrap up all his Fig trees to make sure they too survived the winter. Meanwhile in Pennsylvania Mary’s father and grandfather had a different method of protecting their Fig trees…using odd bits of wood or old doors. This photo is of her grandfather creating a shelter for his Fig tree with the help of two of her brothers.

And this isn’t a picture of her grandfather’s handiwork but it does represent what you end up with, which to a teenager was slightly embarrassing - a series of outhouses!

Mary did also mention the method of ‘burying’ your fig tree!

How to take a Fig Tree Cutting
First of course find a Fig tree and remember Fig tree owners are generous. Channel your inner ‘Mary Menniti’, she has travelled all over America, asking people for cuttings from their Fig trees!
When do you take it?
“You want to work with it, while it is not in active growth. So that would be either early spring or even late fall after it has lost its leaves.
How do I take it?
“You just go to the end of a branch that's a little more than pencil width. So you don't want a really large branch, nor do you want a really little spindly one. But larger than pencil width, and from the end of the branch, you make sure you've taken two nodes where the leaf would be coming out. Make sure you get two nodes, so a little space on top, then the two nodes, a little space on the bottom, and then cut it at an angle. And if you go down, you can continue to take cuttings.”
Remember if you take several cuttings as you go down that small branch, make sure you mark the top, nearest to the bud, so that when you come to plant it you don’t plant it upside down. Trust me when you get home and you are holding a small twig, if you haven’t marked it, it could be difficult to tell.
You don’t have to work quickly but “if it's an hour or so before you get to work with it to plant it, then just a damp piece of paper, a damp newspaper, damp paper towel, wrapped round it, to keep it just a bit moist would be good.”
How do I plant it?
You could put the whole cutting in a small sealable plastic bag with some light soil medium, which you just dampen lightly. Then put it in semi-dark, warm space. “Some people put them on the top of the refrigerator and just let them go up to four weeks or so. Through the clear plastic, you'll be able to see if the little white hair like roots are sprouting.”
Or you could put some soil in a pot and plant the cutting in - almost halfway up. One of the nodes can be covered by soil and then put a plastic bag secured with an elastic band over the pot, to make a little greenhouse. “ As long as they don't dry out that's the fear of losing your cutting” so make sure the soil is not too damp but keeps the cutting moist until it really spouts and is ready to grow on in a pot in the house or outside.
“If that cutting is going to be successful you'll know within several weeks if it's starting to come to life in any way, if the little hair like roots are starting to grow through the soil in the sealed plastic bag or if it's in the pot, it should start leafing out showing a sign of buds at the top after several weeks. But even after several weeks, I never give up on a fig tree. I've kept trees and just nurtured them along for months and they'll surprise you sometimes and they'll come to life when you didn't expect it.”
Can I grow it in a pot?
“Fig trees can be very successful in a pot. They're never going to grow as large and when you plant them in a pot, they do need to be fertilized, where in ground trees, don't really need to be fertilized, they actually sort of prefer a soil that isn't too fertile.”
How long till the first Fig?
“Two years if you're really lucky and you have a really green thumb you might get one or two figs. Often those one or two figs they grow and you get very excited and you think, oh I'm going to have my first figs but they don't produce a mature fruit. They don't last all the way to maturity, they fall off. But there's a chance you might get one after two years or three years. By year four you should be getting your fun first little crop.”
RESOURCES
Do take a look at The Italian Garden Project - it is the most beautiful site with wonderful stories.
I am currently reading The Island of Missing Trees by Elif Shafak. At the centre of it is a Fig tree.

My Fig tree cuttings.